Milan's Thoughts
Modding Demi-Fiend into Bomb Rush Cyberfunk
Nov 09, 2023So some time has passed since the last update. I was hoping to make a few more posts about the game I’m working on but I haven’t had many tangible items to post. I actually wrote most of this last month, and intended to put the mod up for download by now but that’ll have to wait as I’m quite busy at the moment. Anyways, I was really enjoying Bomb Rush Cyberfunk and wanted to try out modding, so I set out with a fun side project to put the character Demi-fiend from Shin Megami Tensei: Nocturne (SMT3) into the game Bomb Rush Cyberfunk (BRCF). An odd choice to put such a mellow, gloomy character into a very upbeat game but I thought that with some stylization it could 100% work.
//Put picture of demifiend and bomb rush cyberfunk
What does this entail? Well it’s all about how much work you’re willing to put in. The modding aspect is not so hard. Youtuber ProjectAlpha animation providing a link to a .blend skeleton in his modding BRCF video description so I had a decent starting point (I’m assuming it’s ripped directly from a character in the game).
However I didn’t want to just use a already existing Demi-fiend model, I decided to make my own from scratch as I wanted something that looked very authentic, as it if were an official crossover (and for legal reasons I’m gonna make it very that this is NOT official, and that Demi-fiend is the property of Atlus.)
With that out of the way, let’s get started!
I made a very rough sketch just to feel out the proportions, and modified it slightly to fit the aforementioned skeleton. Now I actually made a huge error here, which we will get to later. Can you see what it is? (Hint: It’s not the nubby hands I drew in 10 seconds, I can draw hands I swear!)
It’s at this point where I try to focus less on following the reference straight through. To me there is always a large difference between a 2D art and 3D art in just the sense of volume. And so with that I try not to recreate the 2D reference directly, but rather try to interpret the feeling of the drawing rather than the raw proportions. Normally I would not be jumping off of the reference train so early, but because demifiend is just a humanoid figure with some shorts, shoes, and tattos, I think it’s forgiveable here.
Around here I’ve started to develop the head and torso region! There are several ways of handling the serratus/deltoid region, but because BRCF follows a blocky style with 4-sided limbs I decided to respect that and do a simple extruding solution.
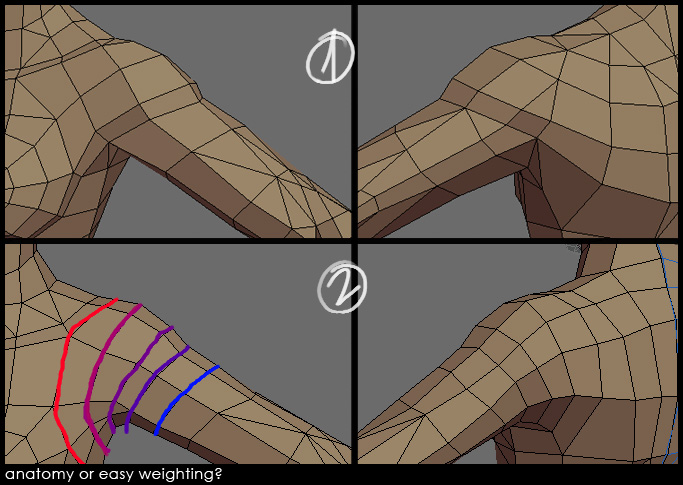 Image by Pior ‘pior’ Oberson
I know skipping over the head process is probably a bit disappointing, but honestly it’s just following the standard template of modeling a head. The real difficulty comes from getting the vertex placement right and I don’t think I really have anymore insight other than following the anatomoical structure of the head.
 All that it takes
We have hands and hair now! Now here’s my favorite part, sharpening. Using hard edges on our model will allow us to create areas of definition which give the model a much nicer look.
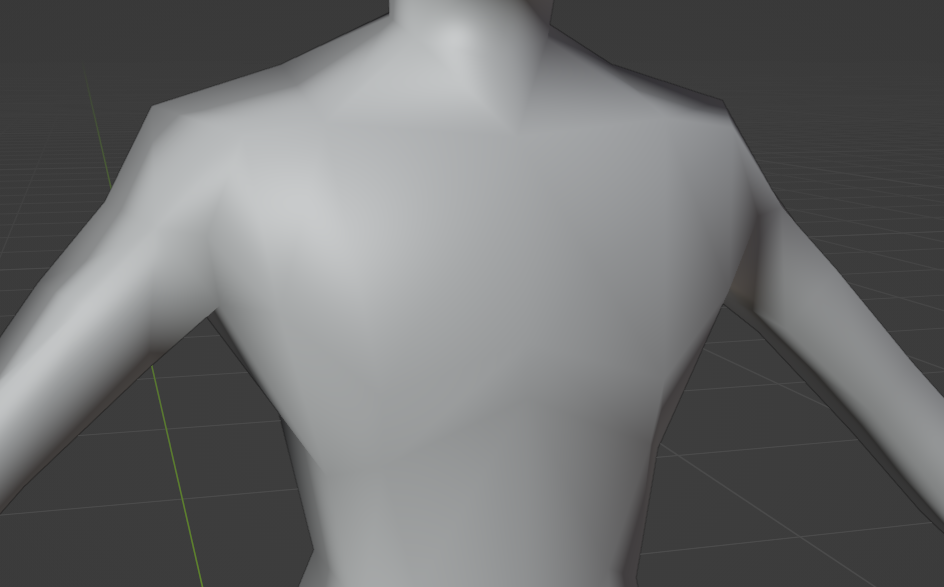
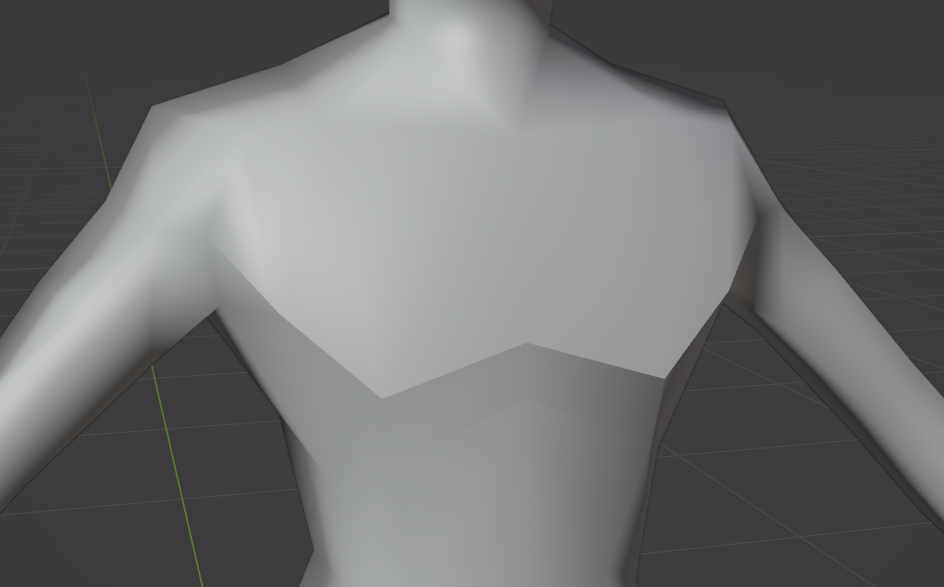
I know it’s a bit strong, but we simply don’t have the polygon density for anything better. Plus it’ll be celshaded so it won’t be as apparent moving forward. In this phase I also spent some time reworking the shoulder placement and hip area.
Now that are basic model is complete we can move onto the most painful part of the modeling process.
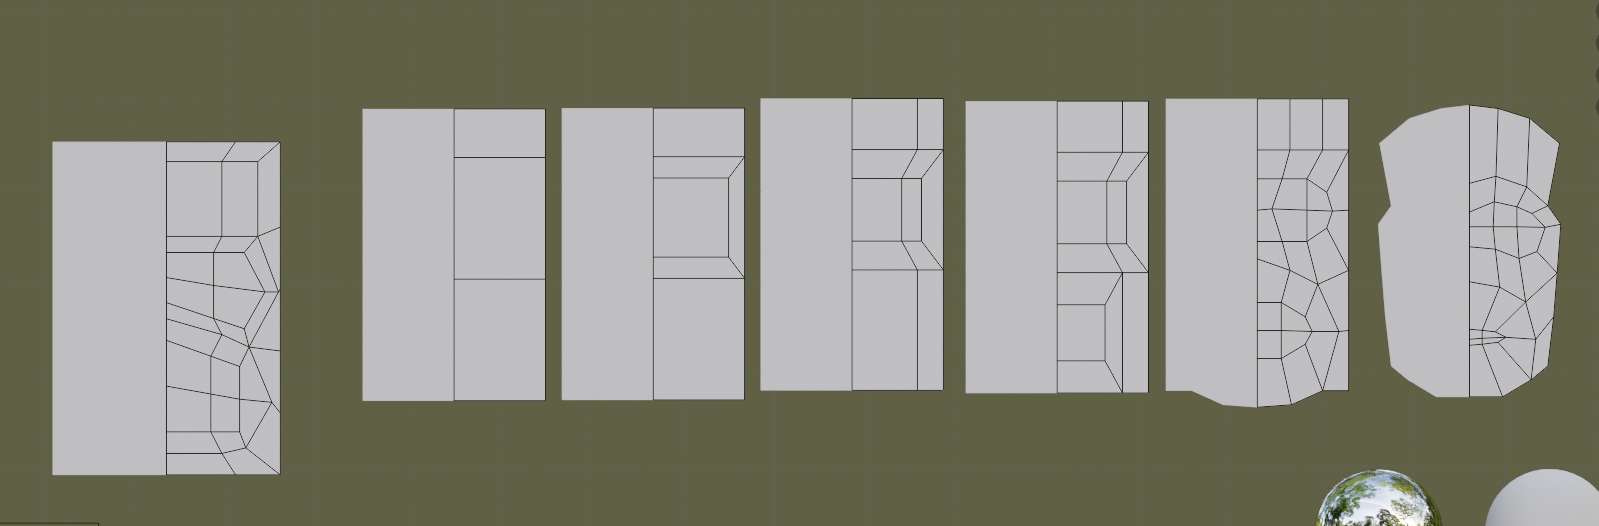
UV editing! So usually when I start UV mapping I’ll try to pick areas on the model where the seams would be least appararent. But here’s the thing: Demi-fiend has few of these. His entire body is covered in tattoos which makes it extremely hard to get away with this. We can’t get away with stretching anywhere because:
- At this texture resolution, any and all texture distortion is extremely obvious
- Demifiend has outlines to go along with his full-body tattoos and that will make any stretching very obvious.
Granted because it’s a 2D projection of a 3D model there will always be stretching, but we can minimize it. I was able to get rid of most of the obvious UV distortion. Luckily Demi-fiend’s arms and body tattoos don’t directly connect so we can safely put a seam there. So we’re now with done with UV mapping right?…
Nope, when 3D modeling for low poly it’s in our best interest to keep as many of the lines as straight as possible. This is because our general resolution is quite low and so we can’t afford to do things like diagonal pixel lines. Anti-aliasing can offset this, but it’s generally preferable to keep everything as straight as possible, so now we have to straighten our lines while also minimizing UV distortion while having few cheat spots. It’s quite fun! :^)

Demi-fiend fans will probably notice the… lack of quality in the tattoos. Don’t worry though, this is just the first texture pass! I will usually just vertex painting to get a feel for color proportions and silhoettes, but because demi-fiend’s iconography rely mostly on his tattoos, there wasn’t much to do in that regard. I spent a lot of time on this pass to make sure that I’d be ready for the final tattooing.

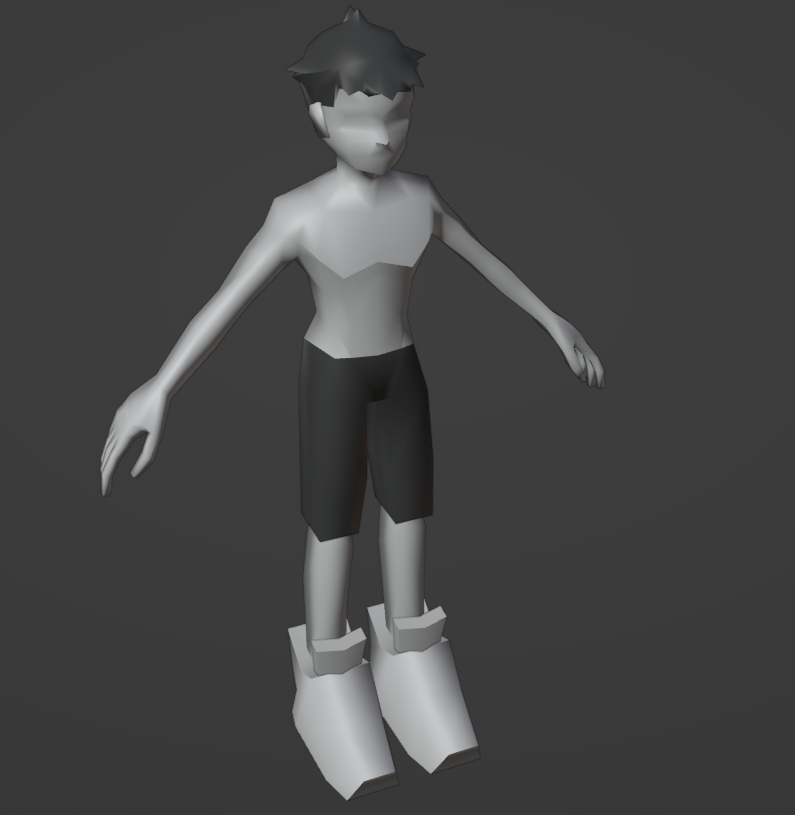
We have our demifiend! This is after the initial texture pass. I redid the face too. I’m not super proud of how the shoelaces turned out but I think it will do. For this portion I decided to take the texture into Adobe Illustrator and recreate all of the tattoos. The tattoos have a cold, hard feeling to them and I thought that trying to organically capture that with a wacom tablet in Photoshop was not the best way to go. Now we can start moving things into engine. I made a simple emmissive texture to capture the tattoo and eye glow and opened up Unity.
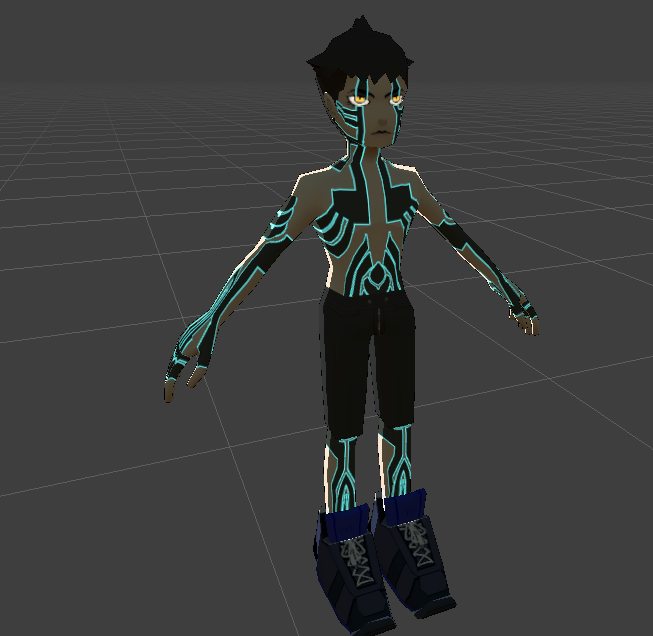
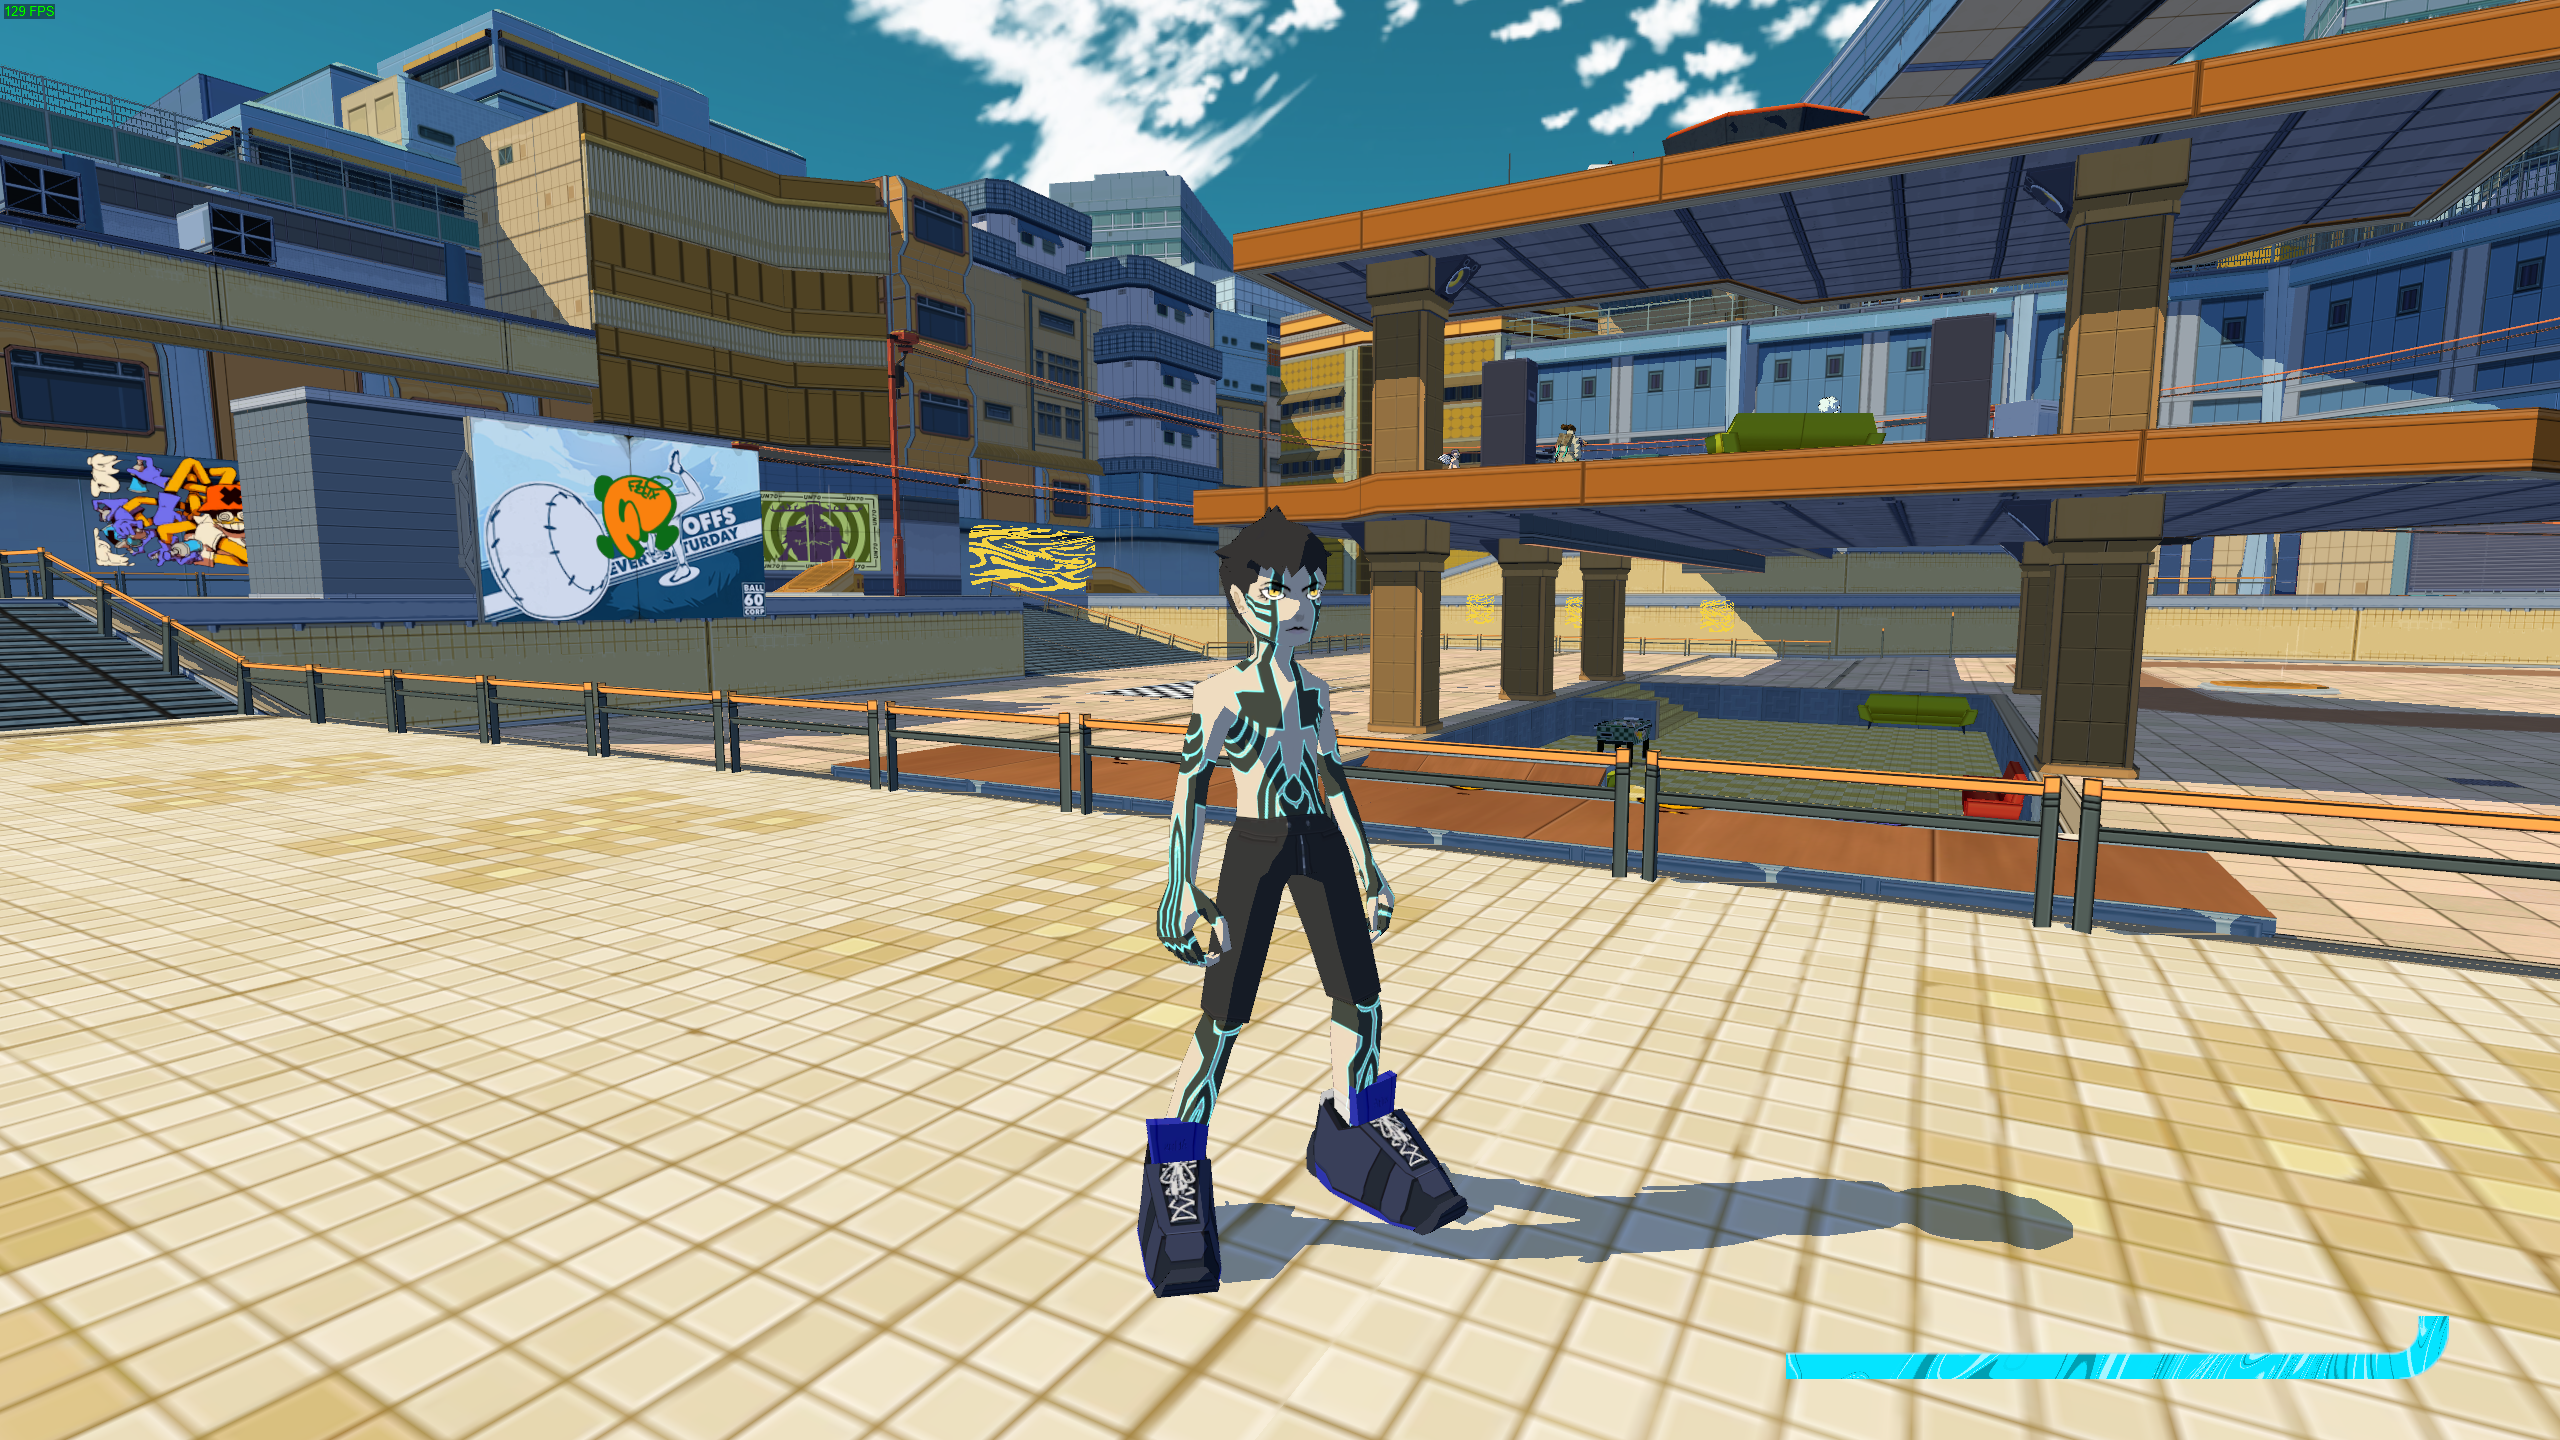
Alright, it’s looking good! Not perfect (note the shoe’s face errors) but good enough to try in engine. I did some dark, dramatic lighting to test for emissions. I also had to use SGiygas’s CrewBoom plugin to setup the model which was simple enough. I also imported some voice clips from SMT3. Now let’s throw it into BRCF and see how it looks.
 Oh…
Oh…
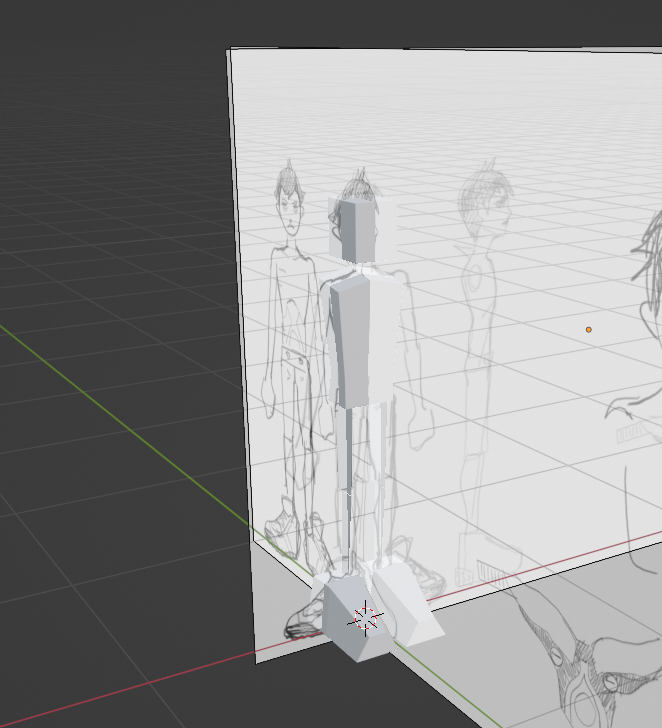
And there’s the mistake I was talking about earlier. Nevermind the incorrect scale, look at the head! It’s so damn huge. I felt quite embarrassed as I completely overlooked the style in this regard. It should be short torso, big hands, long legs, small head.
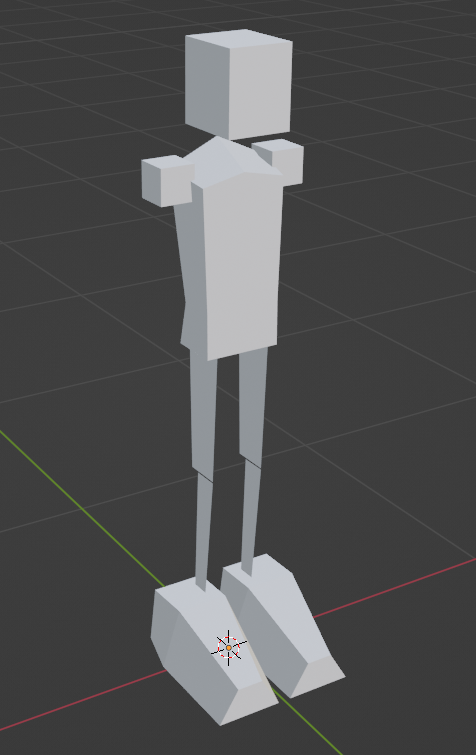
Fortunately this is not at all a difficult fix. I lowered the overall scale by 0.8x and shrunk the head.
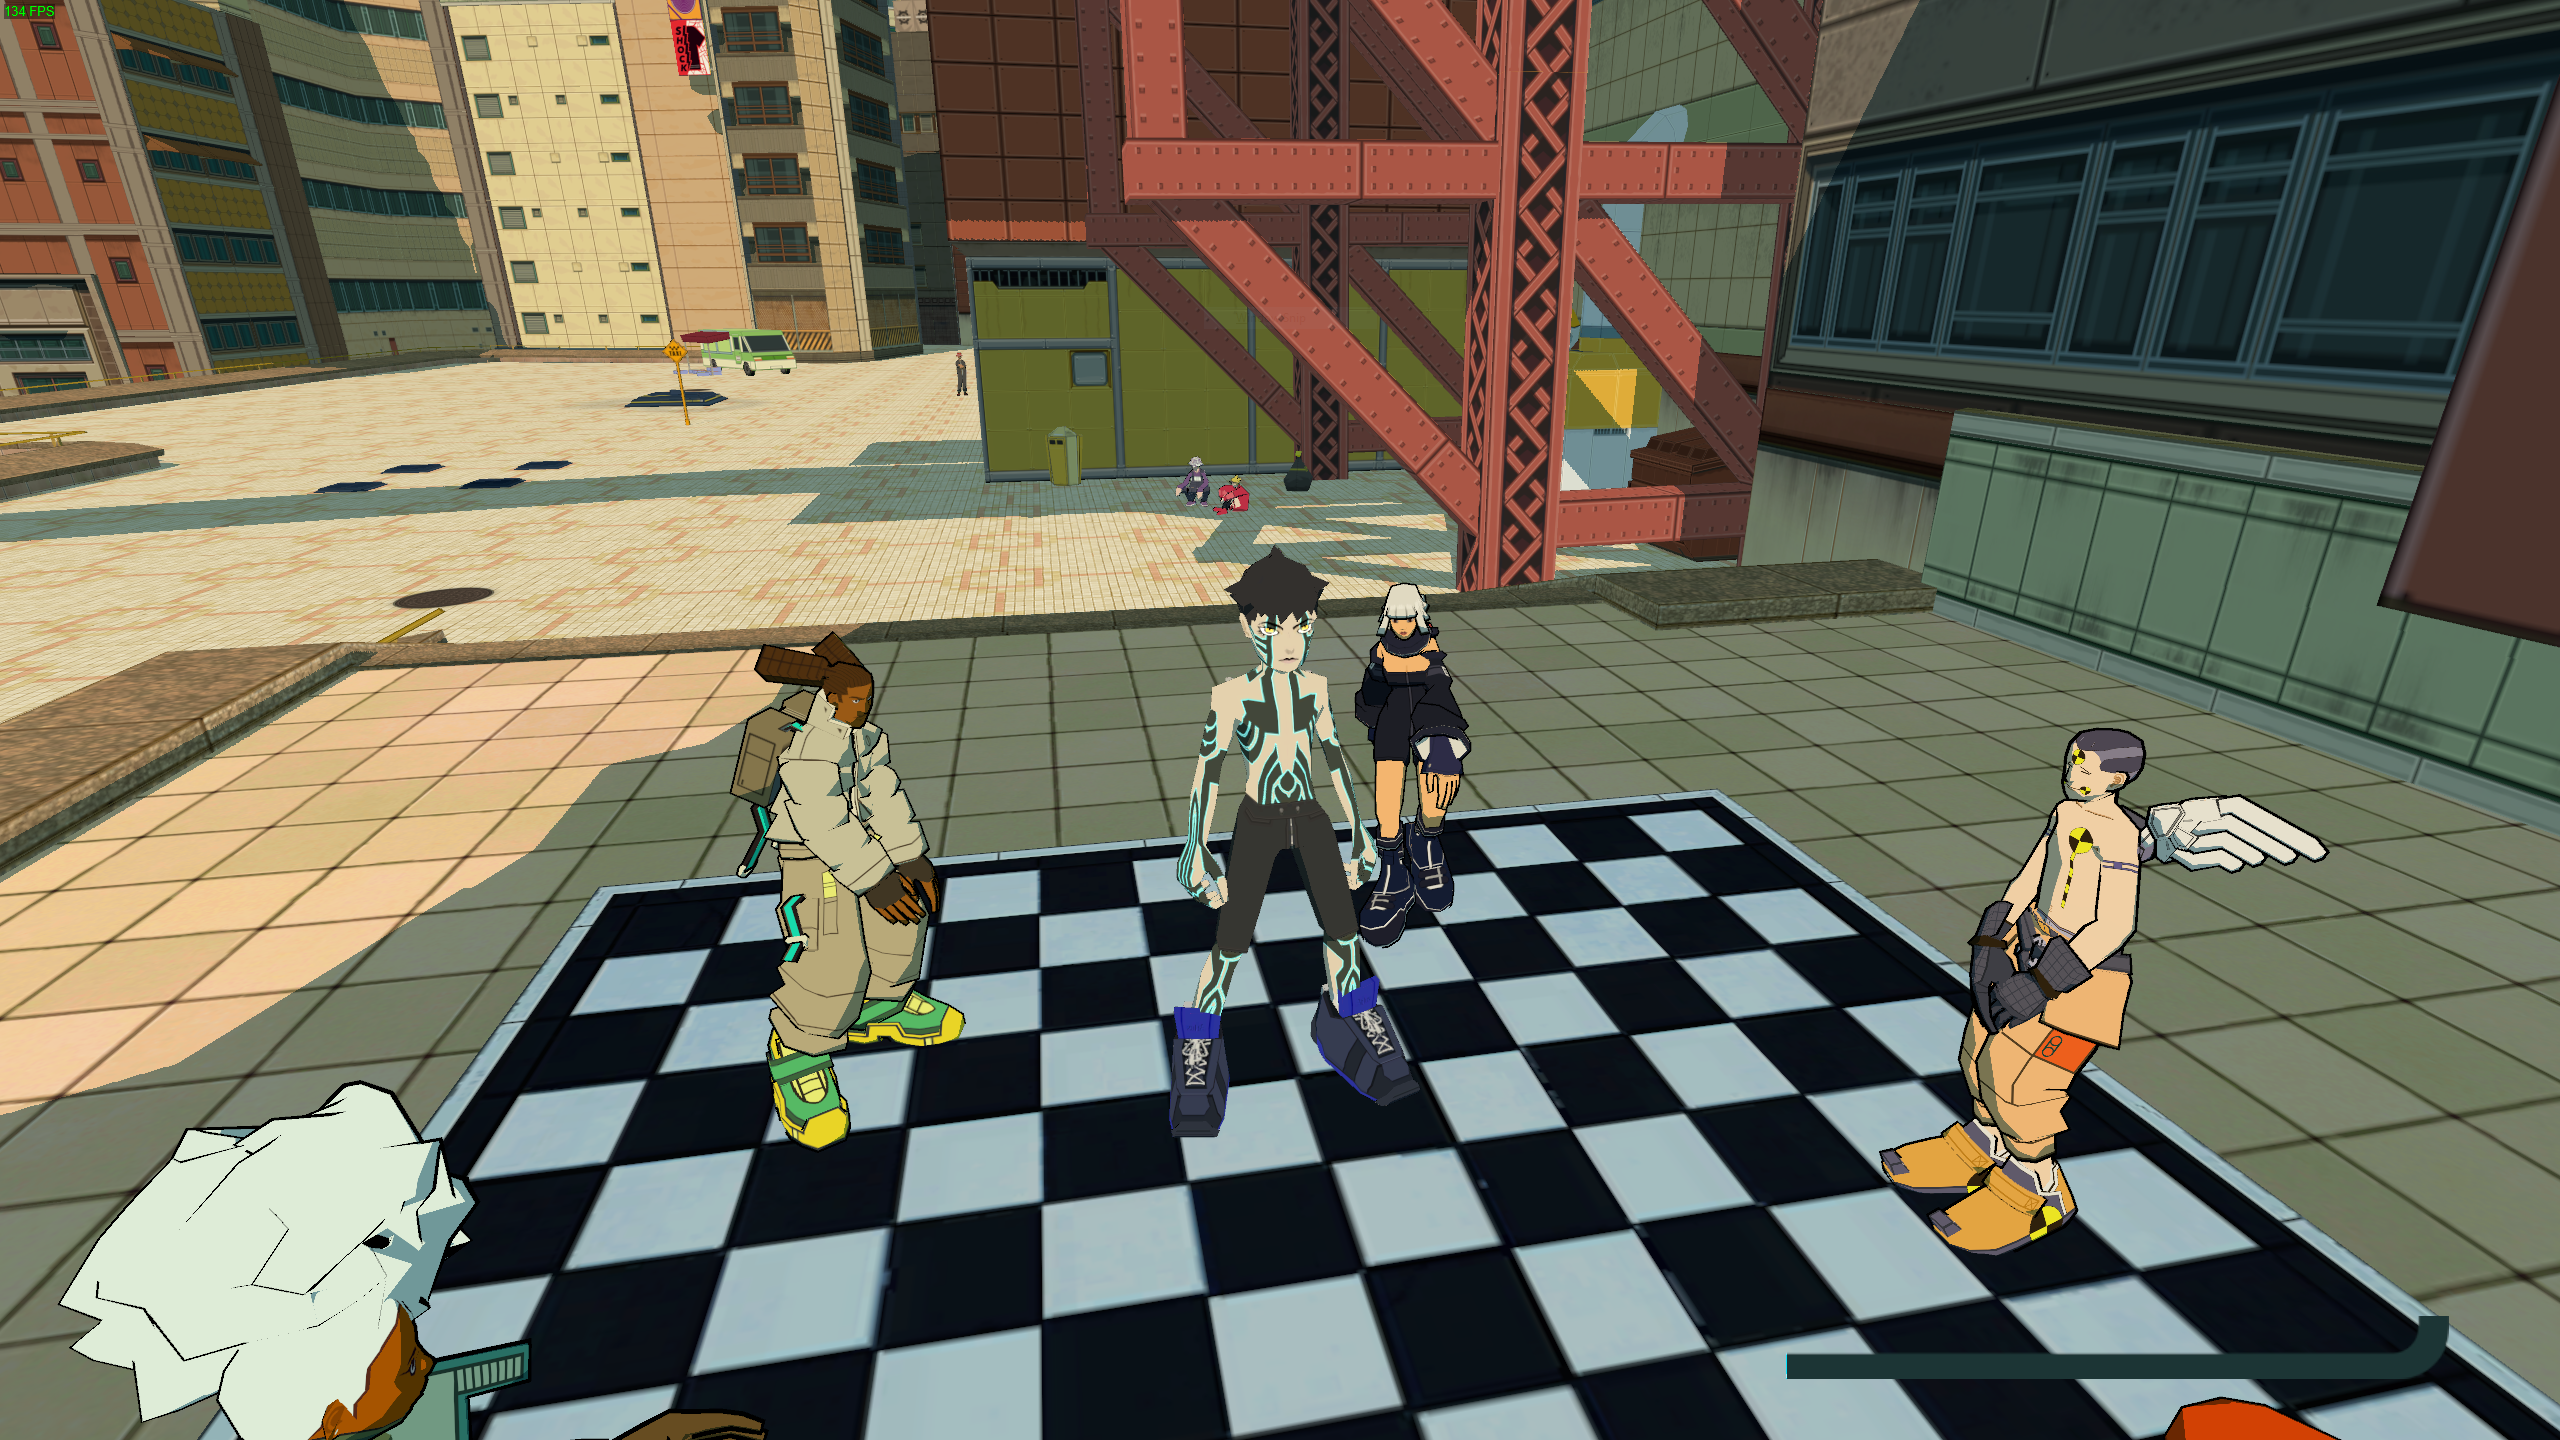
 Much better
There we go, it’s looking pretty good so far! Obviously the skates have to be fixed but that’s easy. For now I’m going to work on the jetpack. All characters in BRCF use a jetpack to propel themselves around the map, so I thought it would be really important to design my own. I thought going off the Magatama, the bug inside of Demifiend that makes him into a demon, would be a good choice. //magatama picture
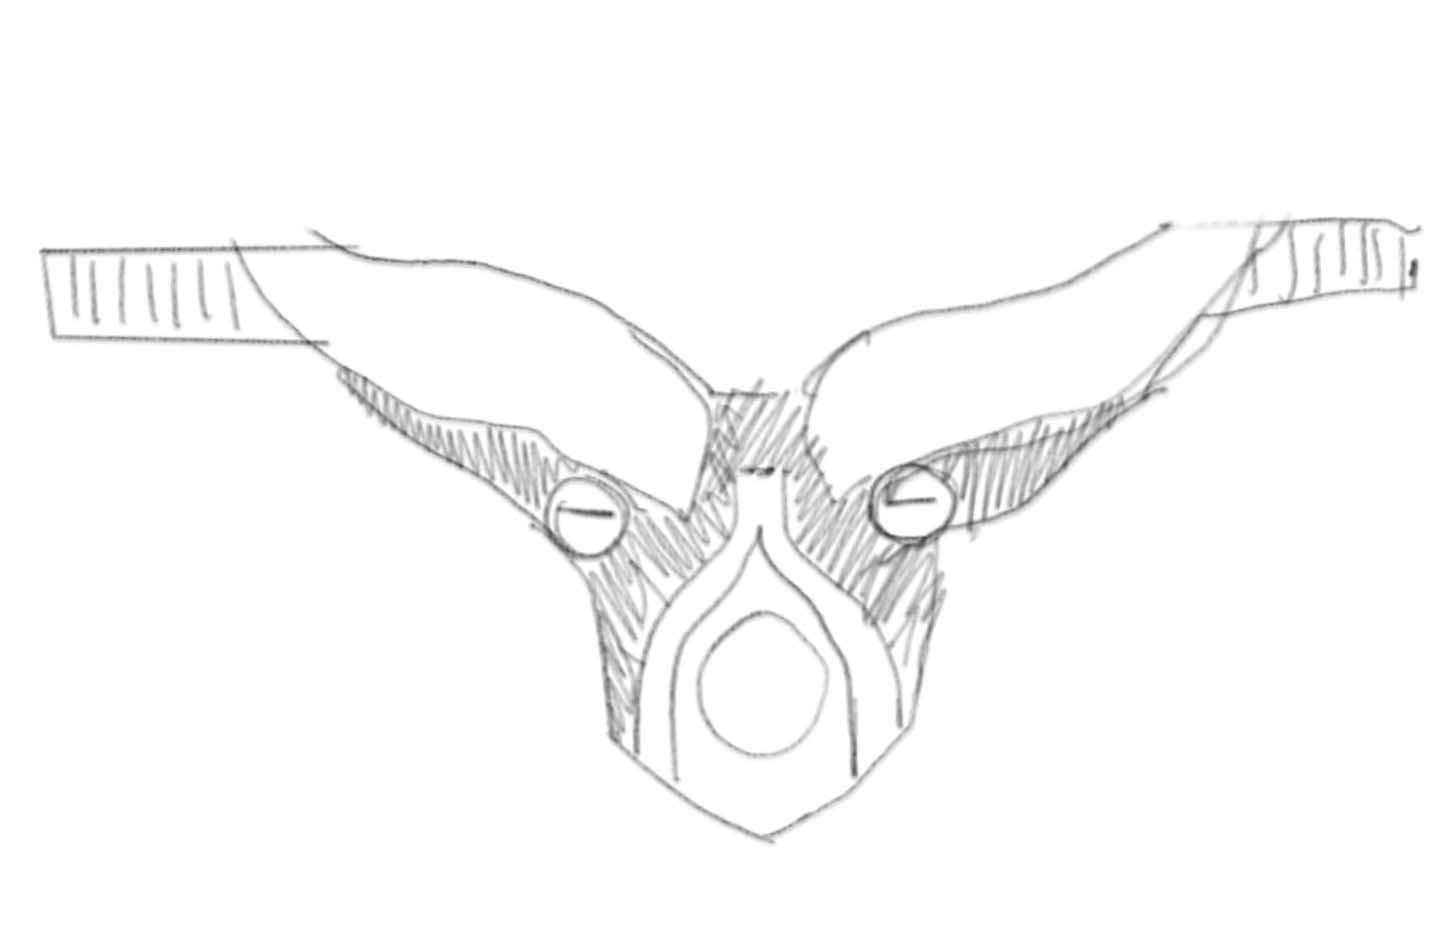
These were just some very quick sketches to get a feeling for the look. I think it looks quite cute and fitting to the game’s atmopshere, time to model it!
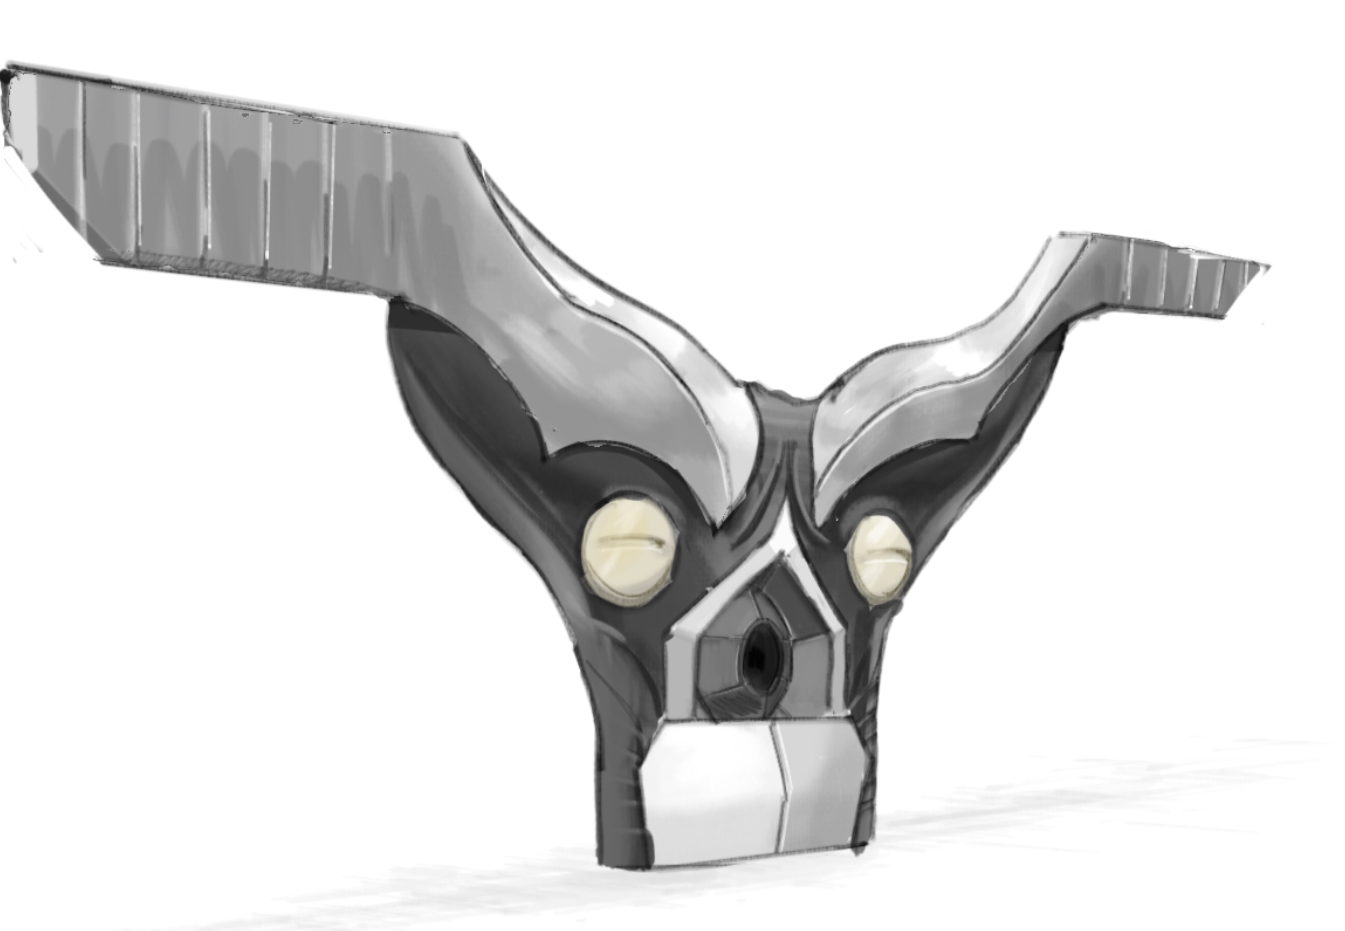
Looks good to me (the square eyes are to better fit with the game art style). I had to shorten the horns because they were ruining the silhouette of the model. It made Demi-fiend look like he had little angel wings which was not what I was going for. They still jut out a little bit but it looks fine to me. I know it looks a little stale without shading but this’ll all change when it’s in engine. While I was at it I fixed the lack of an outline (Always apply your transforms in Blender.)
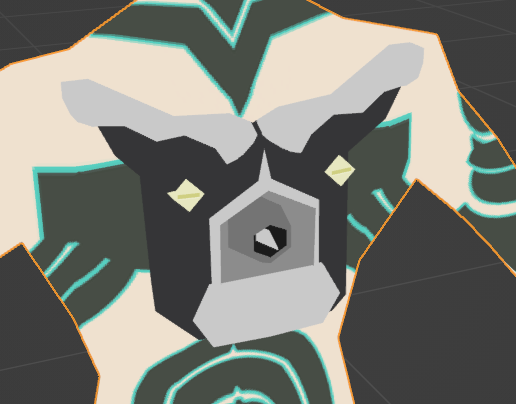
While I was at it, I decided to add one more feature, blinking! Unfortunately we are quite limited with how we can handle this, we don’t have control of meshes turning on and off, we can only do blinking with blendshapes. BRCF will take the first blendshape and use that as the blinking modifier. In my opinion, forcing the vertices down on a low poly model’s eyes to create the appearance of blinking looks kinda shoddy, so I thought, why not abuse blendshapes to swap the location of two mesh eye plates so that we can do blinking? We can get away with this because there is no interpolation, it’s either 0 or 1. Meshes by default will not have aligned normals when you separate them however, and so we’ll have to use Blender’s data transfer modifier to force the mesh normals to look as if they’re connected
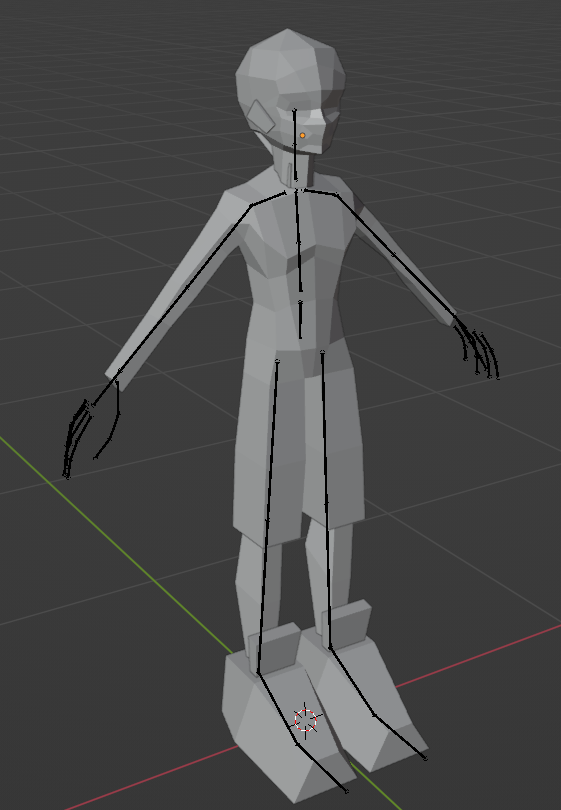
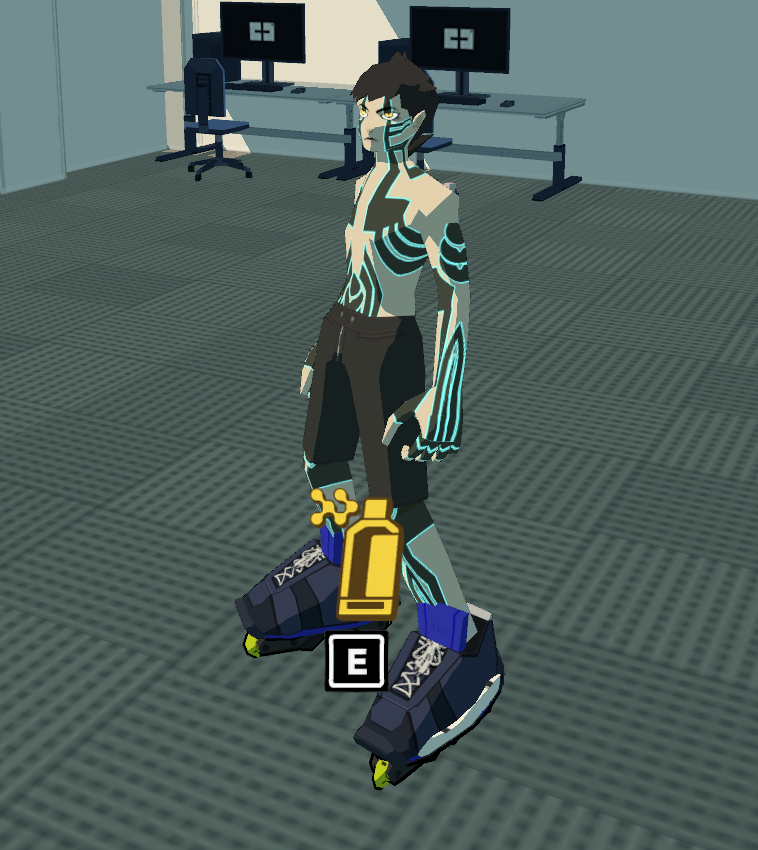
There’s a dancing mechanic, so I thought this would be a good way to get footage and check out the sturdiness of the rig. The latissimus dorsi might be too exaggerrated but honestly I think it’s fine. It goes with the definition of his lats in the concept and so I’m satisfied
Some small issues with the bone weights (look at those knees) but overall it works! I’m quite happy with how this turned out, I think I really captured the style quite well.