Milan's Thoughts
Starting The UI Design
Sep 15, 2023UIs, or User Interfaces, are an important way of immersing your players into a world. It can tell you a lot about the world through their stylistic choices, and can even reflect the contemporary state of the world as trends come and go.
The game I’m working on takes place in the year 19XX and uses a lot of aesthetics seen in early 2000s/late 1990s games. I wish I had a few more presentable art pieces to show off the world, but for now I’m hoping just the UI will give you an idea of what I’m looking for.
My first thought was to start with some text boxes:
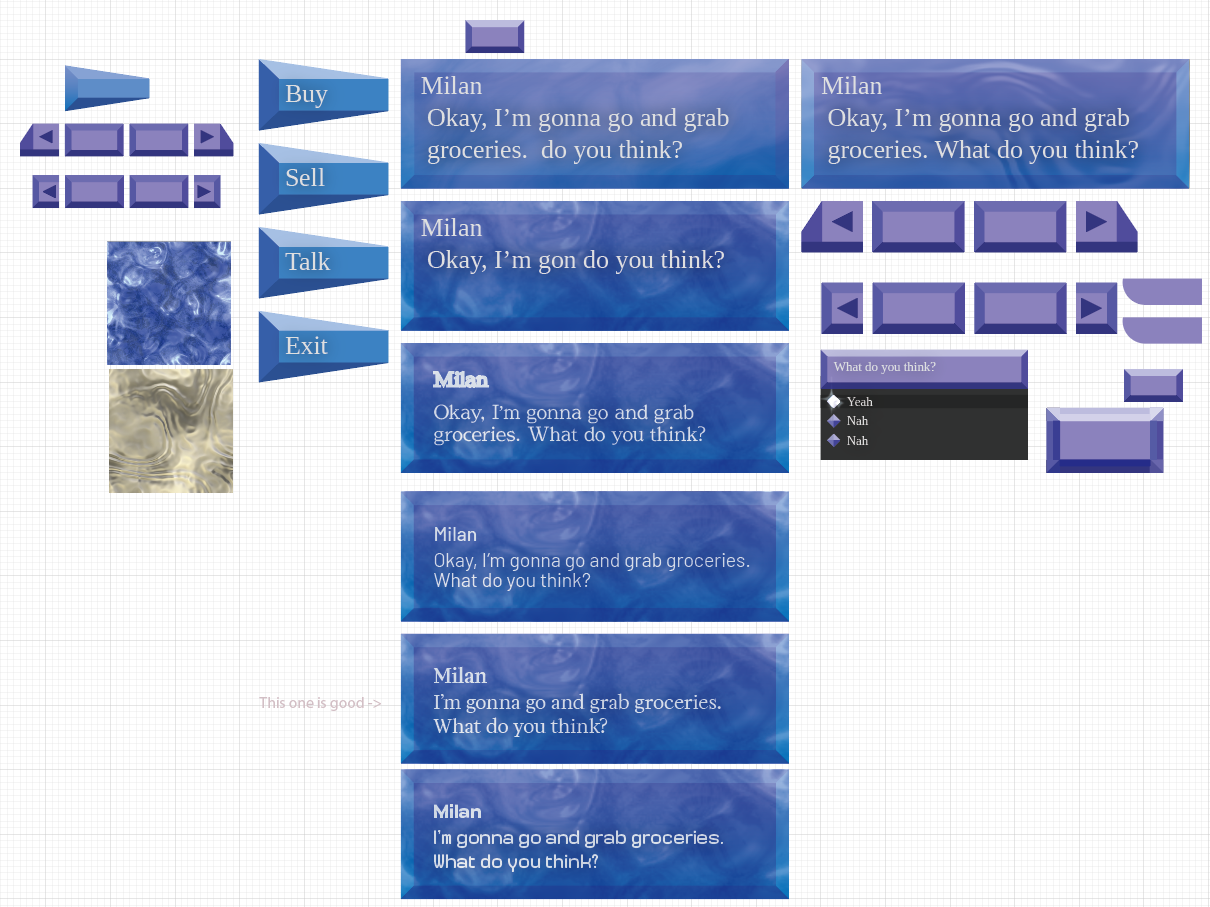
I wanted to do something very blocky and then overlay some texture onto it to give it a ‘retro’ feel.
Where did I get those textures you might ask? I got them from a program called Spiral Graphics. It’s some old software made for texture generation, actually quite analogous to Substance Designer. If you’re looking to make 90s styled games I’d give it a recommendation. Though it’s worth mentioning the website is now defunct and so getting your hands on a copy may be quite hard.
I was going to explore this texture layering process in Illustrator but then I remembered that Illustrator and blendmodes are a terrible combination (it’s so damn clunky). I decided to move into Photoshop for this step.
Very cool! Admittedly it’s a little crude but then I guess you could actually argue that it captures just what I’m going for :^)
But this is all the easy part, now we need to go and make this work in my game engine of choice, Unity 1 .
But how are we actually going to put this stuff into our game engine? The obvious answer might be something like “Just slap the image in there, duh!” but that would present two problems.
- Resolution: How are we going to make sure that this game being played years into the future looks good? If it’s too low quality we run the risk of an choppy, ugly image which can take players out of the game.
- Space: If 16K displays are a thing one day then we’d better have a 16K texture, which I don’t even need to tell you how many megabytes that be (the answer is too many by the way).
So then you’d think “Well then just use signed distance fields or multi-signed distance fields!” which is actually a good idea, and in most cases it would be my option of choice. Unfortunately though, it is not going to work here without some schenanigans.
Because we have very polygonal edges it’s going to be quite hard to capture that look in an SDF as it often softens out sharp edges. Now we could use an MSDF to get those nice sharp edges but I don’t think it’d play well with 9-slice. I tried and the results were not good. Plus with the headers having such a thin taper, gettng that to work with 9-slice would not work unless we thicken the edge to at least two pixels, which is undesirable (I want my razor thin point dammit). This on top of needing 4 SDF/MSDF textures to capture each polygonal face which is just horribly inefficient in my book (We wouldn’t need 5 because in the center we can just use the background color, but it’s still nasty in my opinion)
So I guess we’re out of options then… or are we?
Since the faces are so polygonal we actually have one choice that would work extremely well (Please kill me).
Mesh Generation!!!
Doing a texture would be so much simpler, but that just sounds like the cheap way out. It would suffice for a game jam, but since I value longetivity I believe mesh generation is the way to go.
So where do we begin? Fortunately Unity has a nice built-in mesh generation system for their UI framework. It looks something like this:
using UnityEngine;
using UnityEngine.UI;

class Example: Graphics
{
    protected override void OnPopulateMesh(VertexHelper vh)
    {
        vh.Clear();
        width = rectTransform.rect.width;
        height = rectTransform.rect.height;

        UIVertex vertex = UIVertex.simpleVert;

        float centerTop = width / 2;

        vertex.position = Vector3.zero;
        vertex.color = Color.blue;
        vh.AddVert(vertex);

        vertex.position = new Vector3(centerTop,height);
        vertex.color = Color.red;
        vh.AddVert(vertex);

        vertex.position = new Vector3(width,0);
        vertex.color = Color.green;
        vh.AddVert(vertex);

        vh.AddTriangle(0, 1, 2);
        //ideally you'd also want to use vertex.uv0 to set the uv pos by doing
        //something like vertex.uv0 = new Vector4(vertex.position.x /
        //width,vertex.position.y / height);
    }
}
We simply pick a point for our vertex, add it to our vertex helper, trianglize it with AddTriangle(), and Unity will handle the rest! Just remember that triangle building always goes clockwise. Here’s what it looks like:
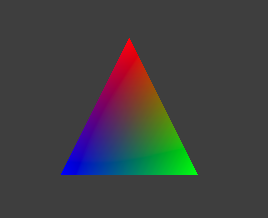 Definitely one of the triangles of all time
Squares are quite similar, but a little trickier, just remember that they’re gonna share a vertex. Here’s an excerpt from my square building class.
public void DrawSquare(Vector3 lowerLeft,Vector3 upperLeft,
    Vector3 upperRight, Vector3 lowerRight, Color color)
    {
        currentColor = color;
        AddVertex(lowerLeft);
        AddVertex(upperLeft);
        AddVertex(upperRight);
        AddVertex(lowerRight);
        vh.AddTriangle(counter - 3, counter - 2, counter - 1);
        vh.AddTriangle(counter - 1, counter, counter - 3);
    }
Square building class? Yeah you’d be crazy to input each vertex by hand, so let’s use a class to handle that for us. It’s very handy because keeping track of the indices is the most frustrating part.
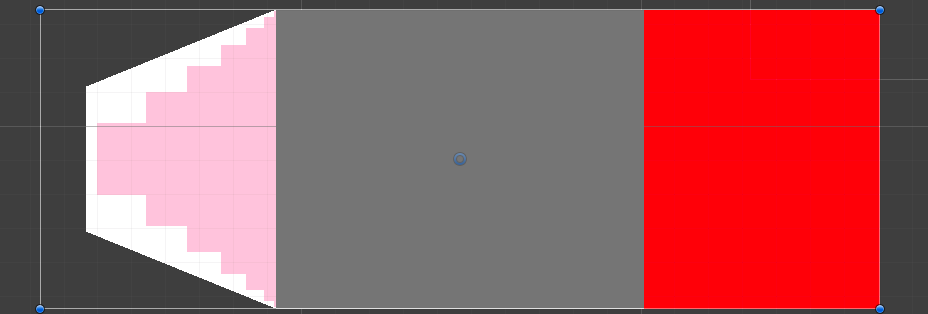
So from here let’s start making that first shape!

This one is incredibly straight forward, do basic squaring math to get our inner dimensions and map out the rectangles one by one. We just have to make sure our rectangles always start in the lower left. Because we’re doing a polygonal object we actually don’t have to worry about connecting all of the mesh vertices together. That would result in vertex colors blending togerther in a Barycentric manner which would really suck and make our UI look cloudy.
As you can see it’s all nicely anchored so we can move it around however we please! Now we have a box that will be crisp till the end of time. Unfortunately we still have to texture it, but fortunately this should be quite simple.
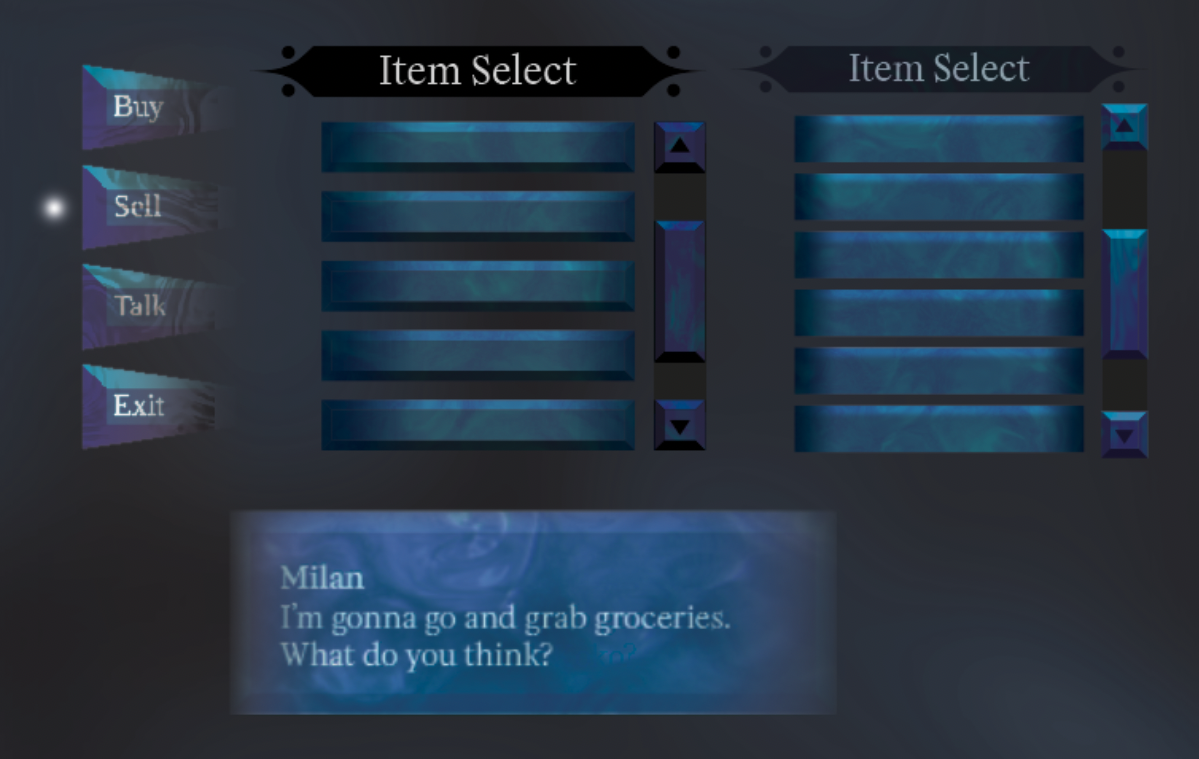
For the final box I decided to go slightly different direction. I generated some water caustic textures in Substance Designer and scrolled them in different directions. Because we’re already doing so much work in both the textures and the mesh generation, I decided to cache the alpha shading in a texture since that’s cheaper. I also threw in another texture cause why not?
I also tried to make the fade off on the sides more apparent as I felt it was insufficient. I’m also quite a fan of the dense shadows under the text and the colored name. I do plan to throw in some additional varients with different scrolling textures so it’s unlikely this is the final final rendition.
Time for a little side-rant. I absolutely hate when dialogue boxes are crammed with 2 1/2 paragraphs of the world’s tiniest text (unless it’s a visual novel cause that’s sorta the point). You don’t need that much text. It’s hard to read, and it’s almost always stuffed with useless word upon useless word. That’s why I elected for 2 lines of dialogue space, as I like to believe that will force me to write smarter text instead of fluff (fluff can be nice, but keep it out of your character dialogue please…)
So uh anyways, let’s move onto that header from earlier!
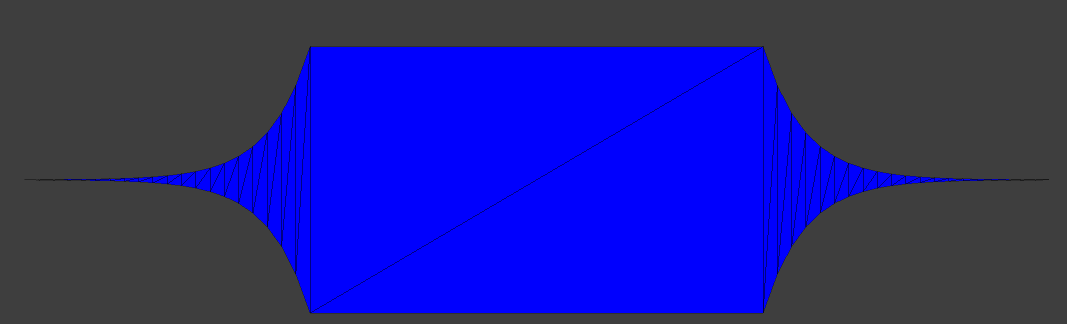
Now this one is unfortunately not going to be as easy, we’ll have to plan out our following moves to get this right. So let’s look at the objectives here:
- We want to control the inner width by a variable.
- We want to control the vertex density of both the tapering ends and the circles surrouding it.
Great! Now let’s come up with an algorithm for those tapering edges
- Make the ends of both sides extrude from the inner width up until the left and right edges the and map that value to the 0-1 range (normalization).
- Normalize the height of the end sides to 0-1
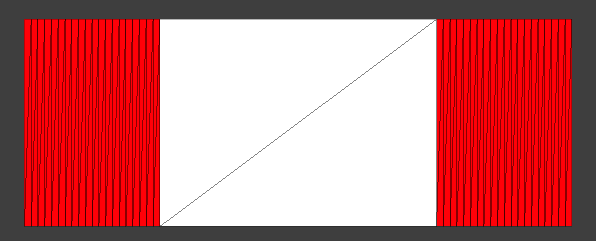 Hey Canada
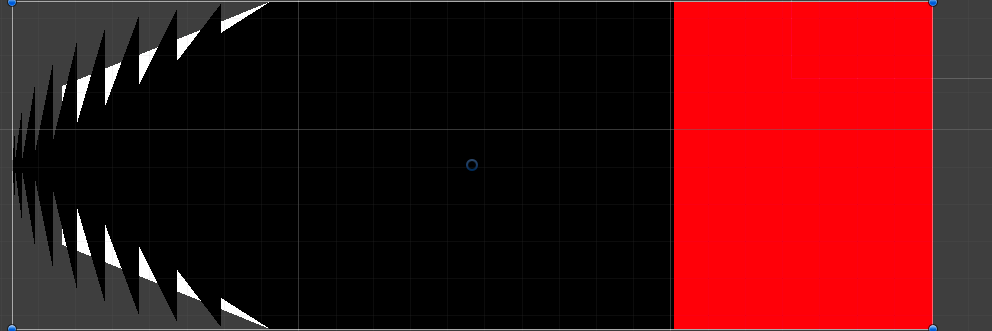
Looking good! But admittedly there was some trial and error, which resulted in some… fun results?
But more importantly, why normalize it? It’s because once we iterate through the ends in our while loop, we can easily plug in any easing function to make the ends contort in fun ways! And there just so happens to be the perfect easing function for my needs.
EaseinExpo! The function looks like this:
float EaseinExpo(float value)
{
    return value == 0 ? 0 : Mathf.Pow(2, 10 * value - 10);
}
//Big thanks to [Easings.net](https://easings.net) for this very handy equation!
Which gives us this result:
 Goodbye Canada
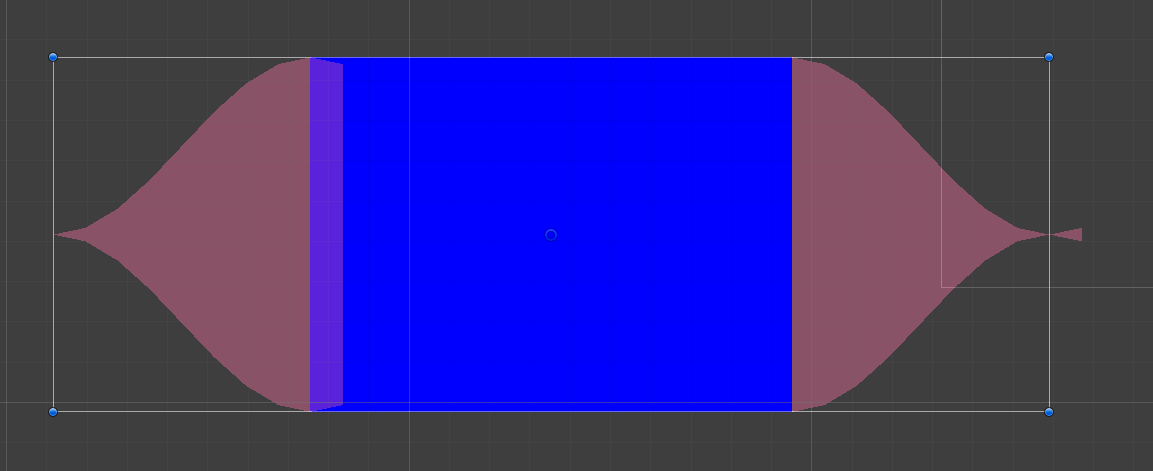
Perfect, it’s just like the concept art! Now doing the circles isn’t so bad, though I’m not gonna describe circle generation as it’s been done many times over (sorry…) We can easily anchor them in place using some of the same variables used to help make our taper, which gives us our final result:
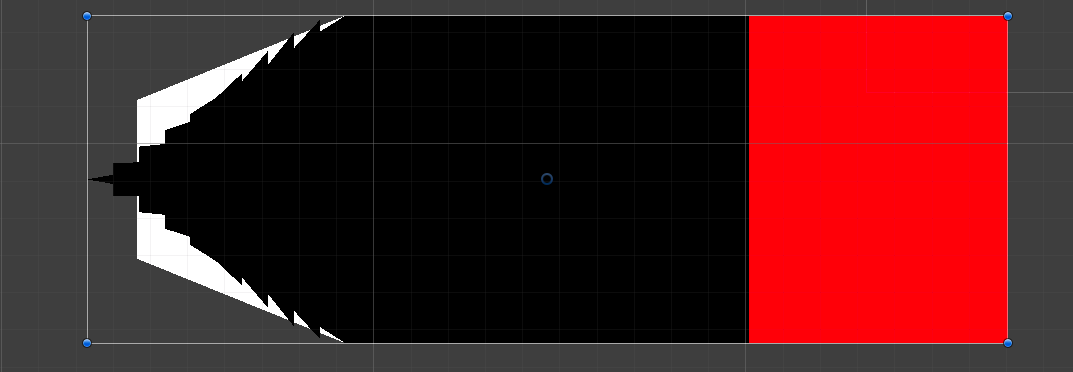
Cool right? Now I know what you’re thinking.
“What the hell was that?”
That? Oh…
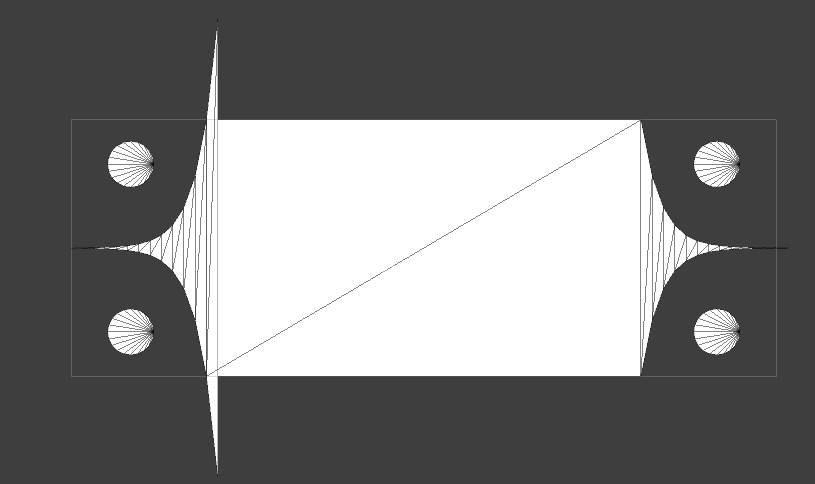 Uhhh, it’s a feature?
My guess is that one extra cycle in my while loop is playing out when it shouldn’t be. Now it only shows up at specific step counts, and so my motivation to fix it is lacking. It’s not a laziness thing, it’s just never actually going to bother people and so wasting extra computing power or lines of code to fix something that no one will ever see is just not necessary.
 I didn’t bother to show the animation since it’s very basic x-axis scrolling
Everything worked out just as I thought it would, which is quite surprising! Now there’s definitely more work to be done, as I do have my gripes. That being said, as I have many other things to do for project, what’s here will suffice for now.
I also don’t want to act like this is the perfect solution, I’m sure some of you are concerned over the same thing I am.
“Generating a procedural mesh every frame must be quite expensive…”
And that’s a very good point to consider! Because it’s so early in development I can’t quite say what the performance ramifications are for sure, but at the same time I’m not doing anything too ridiculous with my calculations, plus there’s room for optimization (some values that could’ve been cached were not…). I’m considering adding options for selecting mesh density to help save on performance, but because the shape is overall quite low poly I think it will likely be fine. Plus it would be non-trivial to move to something simpler as opposed to the other way around.
And that’s all for this little development update. I’m not sure what will be next for posting as I have a lot to work on, but I’m sure I’ll figure that out soon!
1. Yes I am aware of the recent Unity debacle and I am continuing to follow it closely. I have a lot of options swimming around in my head. I’ll say this, even if I do decide to continue with Unity, it will be my final game with this engine for sure.